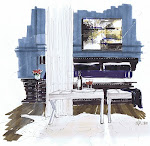
First you create a line dwg. of your room. Tape down an image, sketch up dwg, or hand dwg, with trace or marker paper on top leaving an overhang to use for a colour test strip.
Sketch the space, replacing and deleting furniture and styles, accessories and arch. details. I used the large wall for art, instead of a window, and created coffered ceilings in my sketch. This is a great method for renovations, as you can use "as is" pictures for the base image.


Add your first layer of colour...don't pay attention if it doesn't look just right. Use a tester sheet under the bottom trace paper flap, and remember to put aside the markers you use, so you don't have to search them out again. The things closest to you should have the most detail, things farther away, much less.
I have drawn in my chandelier, and have used a grey on the back walls as a starter point for wall colour.

Add lighting and shadows, thinking of the light sources in the space.

Texture is the key; do it with these criss cross patterns for linen, dots for bucle's, and raise the dots off the edges of fabrics that are really nubbly.

 The lighting effects are emphasized by using swipes of a buttery yellow tria pen. At this stage, I apply dots and criss cross patterns to mimic texture, apply shadows under furniture, and a dark line separating for the item and it's shadow for definition.
One of the biggest things is to leave white space...even if the items are not white. It's the break we need to make order of the overall drawing, and leaving more on the surface of items, creates lighting interest.
Typically, the tops of items will be lighter than the sides. Using two swipes of tria instead of one where light is not cast creates two values of light, adding interest and movement.

Here is the inspiration for the space...the Tissage chandelier.
I like the contrast of the rust fabrics in the space with the Forest/lime green lampshades. The panelling in grey sets the tone for the furniture to pop.
Tape the white paper to the back of your dwg and scan, or reduce by 30% on a colour photocopier to get a finer detail look.

The completed dwg. Don't forget to sign it...it's nice to see how you progress over the years.


 Some Christmas wrapping before it all got squished on the snowy trip to


 Looks like a hairbrush would have been in order,


 Last night I was at the home of Maria Killam of blogger fame


 Felicty Armoire by Thomasville
 Elizabeth Entertainment Center, Oly


 Chateau Eze

 Le Jardin...a garden in the hills of the French Riviera...what's better than that for the afternoon?
 Deluxe Room sitting area


 architectural rendering by CI Neilsen Architects, Nanaimo