If you haven’t noticed, I have a love for the straight line…especially the separation of the sky and sea…the horizon.

Dance of the Sun and Moon, 18 x 24, Acrylic on Linen, Michelle Morelan
Growing up, I was a nature girl; we watched the local blowholes, jigged perch from the dock, went swimming in the ocean, stood in the middle of old cedar snags, letting the light flood around us at exactly noon. We timed the tide, light and weather cycles around our fun. Nature is a dynamic force, and I recognized that early; something to be respected, but equally enjoyed. It’s ours for our moments of respite. The horizon helps to keep us grounded and reminds us of our scale and vulnerability, of distance and depth. It’s the one straight line in nature we can count on.
Now that I am painting regularly, I have noticed the horizon has become something I love to reference. It also has allot to do with my training in applied design, and use of the vanishing point for renderings. I remember at school, my instructor saying “just put the first line on the paper, don’t think about it too much”. A line is a powerful thing. It’s both forceful and peaceful, straight and crooked, wide and thin, and is intentful most of all.


Ink Study, Michelle Morelan, 2009
I thought it may be a good idea to show you a couple of sketches from one of my favourite texts, Francis Ching’s Architectural Graphics. He looks at the horizon and vanishing point, as well as the picture plane and measuring line as it relates to drawing and scaling architecture. I’ve said it before, only part of drawing is talent…most of it is FORMULA. Honestly, you will be amazed if you follow these simple rules…and practice without an end product in mind.

This dwg from Ching’s book covers much there is to know about drawing a perspective.

I did a quick sketch to show you the two most important things in perspective dwg…VP (vanishing point) and H (horizon). See how you can skew the perspective by moving the VP left or right?
Objects get larger and farther apart, as they become closer, and all heads fall off the horizon line. Of course, this is from the eye ht. of a reg. ht. person. If you want a bird’s eye or mouse’s eye perspective, you follow a different set of rules, moving the eye ht. up of down, say…looking down from a balcony.
The dot in the middle of the dwg is the vanishing point, where all perspective lines originate. If you want to try this, print out Ching’s picture, place a piece of trace over it, and start building and interior or streetscape with these rules in mind. A starburst pattern from the VP also is a great guide for starting a perspective…use as many lines in your starburst as you like…the more you use, the more exact your perspective. After time, you will be able to do a dwg without those lines, using only imaginary ones.

Amsterdam, Michelle Morelan- Sketchbook 2009- Not to confuse matters, this is a two point perspective, and has 2 VP’s that are way off the paper.
I see the horizon and vanishing point everywhere. Back a few years ago, when I started to “see”, I noticed it on a bridge, in traffic, in the city, down hallways and from balconies…it follows me wherever I go. Nature skews it slightly, but gives us that one element in nature to guide us- the horizon.

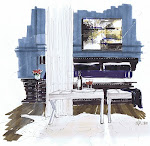
Black Rock Resort in Ucluelet now sits where we used to play as kids.
From standing at this vantage point, can you spot the vanishing point and subsequently, the horizon? Use the chair as your guide, as there are very few straight lines in nature.
On that note…check out Brooke and Steve Ginnetti’s work; her last post features and update on this Maine home. Steve’s sketches, as an architect are stunning, and a great example of using the VP. I can’t say enough about this team…amazing doesn’t cover it. I imagine this is an early step in the process of ideation for Steve, moving on to floor plan, elevations and onto reflected ceiling plans and details.
You have just learned the 1 point perspective…next lesson…rendering 201…2 and 3 point perspectives with more than one VP.


7 comments:
Well darn now I have to study.
Wow, some great tips, Michelle. Love your painting.
Thanks for taking me back to my perspective class, Michelle. Well done!
Michelle, i love this!! I am absolutely going to print out Ching's picture and practice perspective. Love love love - did i mention I love this..:-)
Vitania
Thank goodness for computer generated drawings! I am terrible at renderings. May be I need more practice :-)
Lovely post.
xo,
cristin
This post is fabulous. It makes total sense and I am beginning with a drawing class for interior designers this fall. Will be sure to use your blog as a reference. You are very talented!
I sat in the VERY chair at Black Rock Resort and drank a Mojito!!
I'm going ot print out this post and start practicing some perspective drawing!!
Victoria
Post a Comment