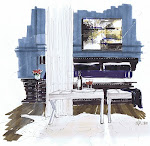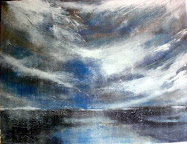
Yellow and Blue Office- Finished Rendering, Michelle Morelan, 2010
Welcome to the first in my video series- #1 Yellow and Blue Office.
Over the last couple of years, there has been interest in me teaching what I do with architectural markers. I’ve always said that anyone can do it, and there are techniques…so here’s the formula that I use typically for un-built spaces. Instead of a computer model, you can also use a photo, replacing and deleting items. I call this the substrate, and it’s the basis for your perspective and rendering. Of course, there are kinds of drawings for ID, from napkin sketches to finished watercolours…
Please bare with me, as this is a learning experience for us, and I had to let some control go just to finish this first video…I knew nothing about the filming process, and it’s more difficult than I thought.
This video is the demo/prototype version for building the series, and I am excited to share it with you. Please, be nice, it took allot for me to put myself out there, and like many of us, I cringed at the inflection of my voice, or a simple hand gesture. My need to share some of the rendering skills I’ve gained, outweighs the fear.
I’m excited…and thanks to all of you for the emails…let’s see how this goes :)
Best, Michelle
***
Print these PDF renderings from my website to participate in the video tutorial


***

Materials used in this rendering:
-
Light table set up (glass, lamp and heavy books will do). If you don’t have piece of glass, consider the “as is” bin at Ikea for a glass door or small table top for one of their cheap end tables; just make sure it’s long enough. Always use tempered glass with a finished edge!
-
Paper: both ledger size plain paper and archival rag paper- Bienfang Graphics 360- 100% rag translucent marker paper (this is like tracing paper, but it doesn’t bleed, is thicker and is able to handle the marker manipulation) these sizes are approximate, and you can work smaller or larger if you like. I have a scanner that scans up to ledger size (11x17). Just ask the clerk for marker paper- archival.
-
Drafting tape; it’s less sticky than regular masking tape, but that will do too…just put it on your pants or skin first to get most of the stickiness off.
-
Artist pen by Faber-Castell in the B thickness; this is a paint brush type tip- a multipack of greys and a multipack of colour is a better deal, but for this dwg, I used 199 (dark gray), 272 (light gray),174 (green), and 247 (blue). There was a quick use of a thicker 180 (raw umber) for the desk, but I went over it with the darker brown to fix it; still this is a useful thickness and colour, and will be used in future dwgs, so I would recommend it
-
Tombo ABt paint pen 491 (glass coloured blue); its duo tipped
-
Copic Markers in W5 (Warm Gray #5), E49 (Dark Brown), 110 (Special Black), E43 (Dull Ivory)
-
Touch Markers CG5 (Cool Gray)
-
Prismacolour 96 (Blondwood)
-
Letraset Tria Marker in 120T (Medium Yellow)
-
A gold roller ball gel type pen
-
A dual tipped black Sharpie
-
Signo pigment ink in UM-153 White


